Building a DIY wood coffee table on a budget is an accessible project for anyone, transforming simple lumber into a functional centerpiece for a living space. This guide details how to select materials, construct, and finish a stylish and sturdy table without exceeding a budget, typically ranging from under $50 to $150 depending on materials and complexity. 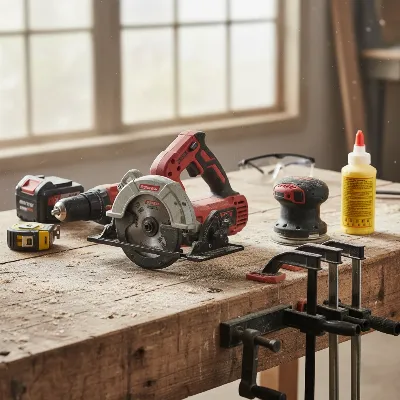 A collection of essential woodworking tools for DIY coffee table building including saw, drill, sander, and clamps on a workbench.
Popular DIY Wood Coffee Table Styles & Materials
Before you pick up a saw, envision the style and feel you want your coffee table to convey. The beauty of DIY lies in customization, allowing you to match your table perfectly to your existing decor.
Wood Types for Budget DIY Coffee Tables
The foundation of your coffee table is its wood. Choosing the right type is crucial for balancing cost, durability, and aesthetics.
- Softwoods (Pine, Fir): For budget-conscious builders, softwoods like pine and fir are ideal. They are readily available, inexpensive, and easy to cut and work with. Pine, in particular, takes stain well, allowing for a variety of finishes, though it’s softer and more prone to dents than hardwoods. Untreated pine is lighter and more affordable.
- Manufactured Boards (Plywood): Plywood offers a smooth, uniform surface that’s excellent for modern or minimalist designs. It’s stable, easy to cut, and can be edge-banded for a clean look. Marine plywood is noted for its toughness and durability.
- Reclaimed Wood: A fantastic eco-friendly and budget-friendly option, reclaimed wood adds character and a unique story to your table. Sources can include old pallets, barn wood, or salvaged lumber. It often requires more preparation, like sanding and cleaning, but the rustic aesthetic is unparalleled.
- Hardwoods: While generally more expensive, hardwoods like oak, maple, and walnut offer superior durability and a high-end finish. They are harder to work with but result in a very sturdy and long-lasting piece. If budget allows for smaller components, they can be considered, but for an entire table, softwoods are more economical.
Common DIY Coffee Table Designs
The design you choose will largely dictate your materials and construction methods.
- Rustic/Farmhouse: These styles often use chunky 2x lumber (like 2x6s or 2x10s) or reclaimed wood, emphasizing natural textures and simple joinery. Pallet or crate coffee tables are classic examples, requiring minimal effort to transform.
- Modern/Minimalist: Characterized by clean lines and often a sleeker profile, modern tables can be made using plywood or by ripping the rounded edges off standard lumber for a cleaner, more solid appearance. Hairpin legs are a popular choice for achieving a contemporary look with minimal effort.
- Industrial: This style often combines wood with metal elements, such as iron pipes for legs or metal accents. Simple, chunky wood tops paired with robust bases create a strong, utilitarian aesthetic.
- Round/Fluted: While slightly more advanced, a round fluted coffee table can be created using pre-cut round wood boards and dowels, offering a trendy and sophisticated look without needing complex joinery like pocket holes.
Comparison of Budget Wood Options
|
Our Picks for the Best Coffee Table in 2026
As an Amazon Associate I earn from qualifying purchases.
|
||
| Num | Product | Action |
|---|---|---|
| 1 | Furinno Andrey Coffee Table with Bin Drawer, Amber Pine/Black Small Non-Lift Top |

|
| 2 | HOOBRO Coffee Table for Living Room, Oval Small Coffee Table with 2-Tier Open Storage Shelf, Industrial Cocktail Tea Table, Wooden Desktop Center Table, Farmhouse, Home Office, Rustic Brown BF09KF01 |
|
| 3 | 35.4" Rectangular Coffee Table for Living Room, Modern Industrial Style Coffee Table Center Table with Metal Frame for Small Space, Apartment, Office, Easy Assembly, Brown |
|
| 4 | Furinno Andrey Coffee Table with Bin Drawer, Columbia Walnut/Dark Brown |
|
| 5 | Smuxee Nesting Coffee Table Set of 2, 23.6" Round Coffee Table Wood Grain Top with Adjustable Non-Slip Feet, Industrial End Table Side Tables for Living Room Bedroom Balcony Yard |
|
| 6 | CAJCA Coffee Table for Living Room Mid Century Modern Center Table with Glass Top and Wood, Brown/Walnut |
|
| 7 | Coffee Table Rectangular Center Table for Living Room Open Space Side Table with Metal Frame, Easy Assembly, Black+ Rustic Brown Wood Coffee Table |
|
| 8 | Square Nesting Coffee Table Set of 2, 23.6"+19.7" Nesting Tables,Small Square Coffee Table with Fluted,Center Table for Living Room Bedroom Office Balcony Yard (Walnut) |
|
| 9 | Japanese Low Floor Table Folding Coffee Tables,22.5''x13.5'' Paulownia Wood Tables Tatami Tables Meditation Table Altar with Storage |
|
| 10 | Mid Century Modern Solid Wooden Coffee Table,Small UniqueTriangle Wood Center Tables, Sturdy TeaTable Suitable for Living Room Bedroom Balcony Patio Walnut |
|
Here’s a quick comparison to help you decide which material suits your project best:
| Feature | Pine / Fir (Softwood) | Plywood (Manufactured Board) | Reclaimed Wood |
|---|---|---|---|
| Cost | Very Low | Low to Medium | Very Low (can be free) |
| Durability | Moderate (prone to dents) | Good (especially marine grade) | Varies greatly by original wood type and condition |
| Ease of Work | Very Easy (soft, easy to cut) | Easy (uniform, easy to cut and shape) | Varies (can have nails, uneven surfaces, requires prep) |
| Aesthetic | Natural grain, takes stain well (can look rustic) | Smooth, modern, takes paint/stain uniformly | Unique character, rustic, weathered |
| Best For | Beginner projects, rustic, farmhouse, stained finishes | Modern, minimalist, painted finishes, curves | Unique, rustic, character-rich pieces |
Step-by-Step Guide: Building Your Budget DIY Coffee Table
Building your own coffee table is a series of manageable steps. Careful planning and execution will ensure a successful outcome.
1. Planning Your Project
Before any wood is cut, thoughtful planning will save you time and prevent costly mistakes.
Start by sketching your desired table. Think about its primary function: will it only hold drinks, or do you need integrated storage? Measure your living space to determine the ideal dimensions, ensuring the table complements your seating arrangement without overwhelming the room. A standard coffee table typically stands 16 to 18 inches tall, aligning comfortably with most sofa heights. Consider the shape—rectangular, square, or round—and how it will fit the flow of your room.
2. Gathering Materials and Tools
One of the most appealing aspects of a budget DIY project is that it often requires only basic tools, many of which you might already own or can easily borrow.
Essential Tools:
- Measuring Tape & Pencil: For accurate layout.
- Saw: A circular saw or miter saw for cutting lumber.
- Drill: For pilot holes and driving screws.
- Sander: An orbital sander is ideal, with various grits of sandpaper (60, 80, 120, 180, 220).
- Wood Glue: Essential for strong joints.
- Screws: Appropriate length for your wood thickness (e.g., 2.5-inch Kreg screws for 2x lumber).
- Clamps: To hold pieces securely while glue dries.
Optional Tools (Can enhance quality or ease of build):
- Kreg Jig: For creating strong, concealed pocket-hole joints.
- Planer: Useful for distressing wood or achieving a uniform thickness.
- Router: For decorative edges.
Material List (Example for a simple pine table):
- (2-5) 2×6 or 2×10 pine boards (quantity depends on size and design)
- Wood conditioner (if using pine and staining)
- Wood stain or paint
- Polycrylic or other protective sealant
- Optional: Table legs (if not making from wood), figure-8 fasteners for attaching tops.
3. Cutting and Preparing Your Wood
Accuracy in this stage is paramount for a successful build.
- Measure and Mark: Carefully measure and mark all your cuts according to your plan. “Measure twice, cut once” is a golden rule in woodworking.
- Cut Your Boards: Use your saw to make precise cuts. For tabletops, you’ll typically cut multiple boards to the same length. For legs, cut to your desired height.
- Optional: Rip Edges: If using standard framing lumber (like 2x6s), the edges are often rounded. Ripping a small amount off these edges with a table saw can create a cleaner, more professional look, making the finished piece appear less like construction lumber and more like fine furniture. This creates tighter joints when joining boards for a tabletop.
4. Assembling the Tabletop and Legs
This is where your table begins to take shape.
- Assemble the Tabletop:
- Lay out your tabletop boards, arranging them to find the most appealing grain pattern.
- Apply a generous, even layer of wood glue along the edges where boards will join.
- Clamp the boards together tightly. If using pocket holes, drill them on the underside or inside edges before assembly, then secure with screws while clamped. If not using pocket holes, wood glue with strong clamps can often be sufficient, possibly supplemented with angled screws from the underside for extra strength.
- Allow the glue to dry completely according to the manufacturer’s instructions.
- Construct and Attach Legs:
- Legs can be individual posts, built-up from multiple boards glued together, or pre-made components like hairpin legs.
- For built-up legs (e.g., two 2x6s glued face-to-face), ensure they are square and sturdy.
- Attach the legs to the tabletop. Common methods include:
- Pocket Holes: Drilling pocket holes into the top of the legs or into aprons (support pieces) that connect the legs, then screwing them into the tabletop.
- Corner Brackets/Figure-8 Fasteners: These metal connectors offer a simple way to attach legs or a base structure to the tabletop.
- Angled Screws: Driving screws at an angle from the legs into the tabletop for a secure, hidden connection.
- Ensure the legs are evenly spaced and plumb (straight up and down) before securing them fully.
5. Finishing Touches
The finish protects your table and brings out the beauty of the wood.
- Sanding: This step is crucial for a smooth, professional finish. Start with a coarser grit (60 or 80) to remove imperfections, then progressively move to finer grits (120, 180, 220) for a silky smooth surface. Sand with the grain of the wood.
- Staining/Painting: If using pine, apply a wood conditioner first to ensure even stain absorption and prevent blotchiness. Then, apply your chosen stain or paint according to the product instructions. Wipe off excess stain promptly.
- Sealing/Protecting: Once your stain or paint is dry, apply a protective topcoat like polycrylic, polyurethane, or a hardwax oil. These finishes protect the wood from moisture, scratches, and daily wear. Apply multiple thin coats, sanding lightly with very fine grit (220+) between coats for the smoothest result.
Budget Considerations for Your DIY Coffee Table
Building on a budget doesn’t mean sacrificing quality or style. It simply requires smart choices and resourcefulness.
Cost-Saving Tips
- Choose Affordable Wood: Pine, as discussed, is your best friend for budget projects. Look for common dimensions like 2x6s or 2x10s at home improvement stores.
- Utilize Reclaimed Materials: Scour local listings for free pallets, old fence boards, or discarded furniture that can be repurposed. Community woodworking shops or construction sites might also have scrap wood.
- Borrow or Rent Tools: If you don’t have all the necessary tools, consider borrowing from a friend or renting them for the day. This can significantly reduce upfront costs.
- Shop for Sales: Keep an eye out for sales on lumber, stains, and finishes at your local hardware stores. Buying in bulk or during seasonal promotions can yield savings.
- Simple Design: A simpler design with fewer complex cuts or joinery techniques often requires less wood and fewer specialized tools, inherently lowering costs.
Price Segments for DIY Projects
- Under $50: Achievable with minimal new lumber (e.g., one or two pine boards), repurposed materials like pallets, and basic hardware.
- $50-$150: Allows for a moderate amount of new lumber (e.g., several 2x boards), a Kreg jig if desired, and a wider range of stains or finishes. This is a common range for sturdy, attractive DIY coffee tables.
- Over $150: This budget allows for higher-grade softwoods, more complex designs, or possibly incorporating some specialty items like designer metal legs or more premium finishes.
Where to Source Materials
- Local Lumberyards & Home Improvement Stores: Best for new lumber, screws, glue, sandpaper, and finishes. Compare prices between stores.
- Online Marketplaces: For reclaimed wood, unique hardware, or specific pre-made legs (like hairpin legs).
- Local Woodworking Groups/Forums: Often have members selling or giving away scrap wood.
Conclusion
Building your own DIY wood coffee table on a budget is more than just a money-saving venture; it’s an opportunity to create a truly unique and meaningful piece for your home. By thoughtfully selecting materials like versatile pine or character-rich reclaimed wood, embracing simple yet effective construction techniques, and finishing with care, you can craft a durable and beautiful coffee table that perfectly fits your style and needs. This hands-on experience not only enhances your living space but also provides a deep sense of accomplishment.
Frequently Asked Questions
How long does it take to build a DIY coffee table?
The time required varies greatly depending on the complexity of the design and your skill level. A simple, basic design might take a weekend (8-12 hours of active work, plus drying time), while more intricate projects could span several weekends.
What’s the easiest DIY coffee table for beginners?
Pallet or crate coffee tables are among the easiest, often requiring just sanding, assembly, and finishing. A simple rectangular table using 2x lumber with basic butt joints and screws is also highly beginner-friendly.
Do I need a Kreg jig for a DIY coffee table?
No, a Kreg jig is not strictly necessary. While it creates strong and aesthetically pleasing pocket-hole joints, many simple coffee table designs can be built using wood glue and screws driven at an angle, or with simple butt joints reinforced by glue and clamps.
How tall should a coffee table be?
Generally, a coffee table should be similar in height to the cushions of your sofa or slightly lower—typically between 16 and 18 inches tall. This ensures comfortable access to drinks and items on the table while seated.
Can I use pallets for a coffee table?
Yes, pallets are an excellent and affordable source of reclaimed wood for a rustic coffee table. Ensure the pallets are heat-treated (marked “HT”) rather than chemically treated (“MB” for methyl bromide), thoroughly clean them, sand them well, and check for any protruding nails before use.
Get our weekly buyer guide
Practical specs, not advice. Unsubscribe anytime.
The instructions for building the coffee table were mostly clear, but I had a bit of trouble with the finishing section. My table ended up a little darker than I wanted, even after following the advice on wood types. It’s still functional and looks decent, but the final aesthetic wasn’t quite what I envisioned.
I’ve always wanted a custom coffee table and this DIY guide made it possible. The tips on essential woodworking tools were spot on; I already had most of them. My table is a perfect match for my decor now. It was a fun weekend project and saved me a ton of money compared to buying one.
This guide was fantastic for building a wood coffee table! I loved the emphasis on customization to match existing decor. I was able to create a unique piece that fits perfectly in my space, and the cost was well within the $50-$150 range mentioned. It’s amazing what you can do with simple lumber and good instructions.
I followed the steps to build a wood coffee table and I’m so happy with how it turned out! The guide on selecting materials was super helpful, especially for staying under my $100 budget. It looks great in my living room and feels really sturdy. Definitely recommend this project for anyone wanting a custom piece.